My husband and I first met when he began offering me packs of Starburst wrappers as an ice breaker.
The wrappers were colorful so I began to save and organize them. I didn’t really know what to do with them at that point but as most trash I deem saving I knew they would come in handy eventually (isn’t that what all crafters say??)
Around the same time a friend had shown me how to make a Starburst wrapper chain. Such a simple idea that can be used for bracelets and necklaces. That’s when I got the idea. My goal would be to save enough wrappers to make something to wear but on a larger scale, like a dress. I had heard of other people making candy wrapper prom dresses so it couldn’t be so difficult right?
Note: If you decide to attempt this, make sure you set aside time and patience!!
I had no clue to what extent this project would take over my life for the next 5 years. I would bring candy to work and ask coworkers to help save the wrappers. Wrappers could be found scattered through the house. I kept bags of them in my purse to sort and fold while waiting in line at the grocery store or in between classes. Friends, family, neighbors, pretty much anyone who knew us took part.

After sorting the wrappers into colors I would iron them flat and separate them into colored sections.
FYI- don’t use an iron straight onto a wrapper, put a cloth or wax paper over it first! I ruined my iron and ironing board from melting off the wax coating onto the hot plate.
Once enough of one color was saved I would fold them into links and then into full chains. I decided early on to keep most of the colors completely separated. Some previous attempts at dresses I’d seen looked pretty busy in the chain sections because they had all the colors mixed together. I also decided the dress would be done completely from chains instead of sections with individual loose wrappers for the same reason.
3 Years Later…

It took about 3 years to get to this point. I had enough chains to start thinking about a design. Over that time I realized the original colors (red, pink, orange, and yellow) were the most abundant colors so they would play the biggest part. Some of the other colors were much harder to find and even a few I had planned to use were discontinued (such as bright green and blue- my favorites too!).
I had to redesign my dress design multiple times because of this, but thankfully I ended up with enough wrappers to complete this final rough design: colored sections and accent multi-color trim along the bottom and sleeves.

Note: the final dress is a good 12 inches longer than in the sketch. When I drew this I had almost considered making just a long shirt when we realized I might need to save wrappers for a couple more years to make a longer dress. In fact, the actual dress ended up being very heavy…any longer and it might have uncomfortable to walk or keep from falling down!
Sewing
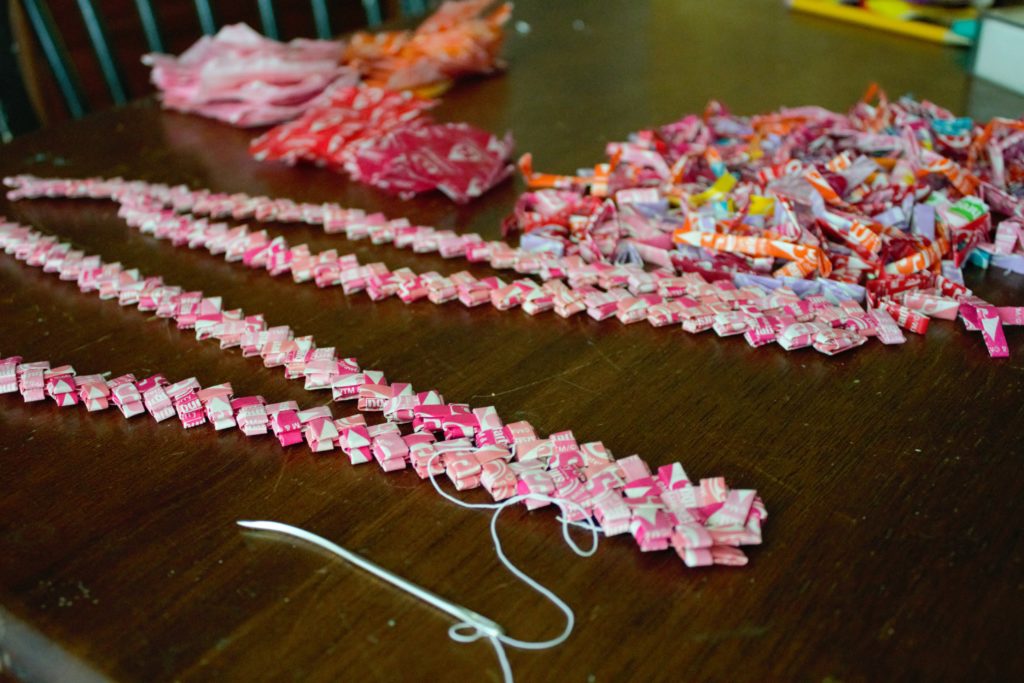
Another year later I had all the chains ready and absolutely NO IDEA how to sew them together. I didn’t add a fabric backing because I wanted the chains to become the fabric themselves. Glue didn’t give enough flexibility and came apart easily. Regular thread was either too stiff or not strong enough. I owe the idea that actually worked to my mother. She suggested elastic thread because it is stronger AND flexible.
After laying out the pattern, (each individual chain had about 250-300 wrappers in it- that equals about 4 regular bags of Starburst) I had to measure each individual chain to wrap around my body at the waist, hips, and chest. Then I began sewing together each chain one by one.
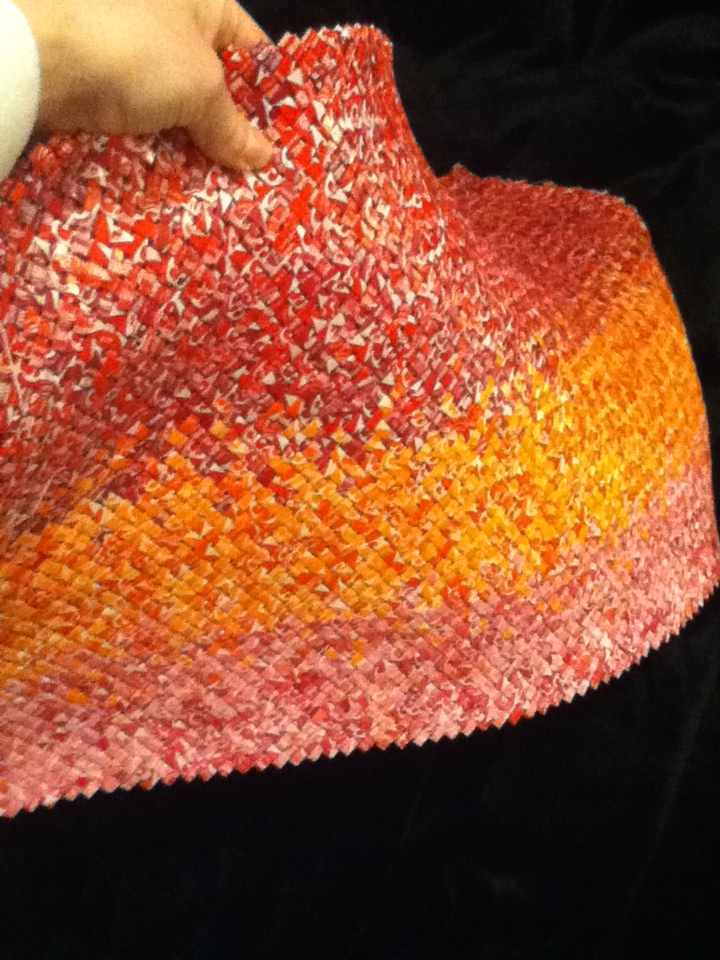
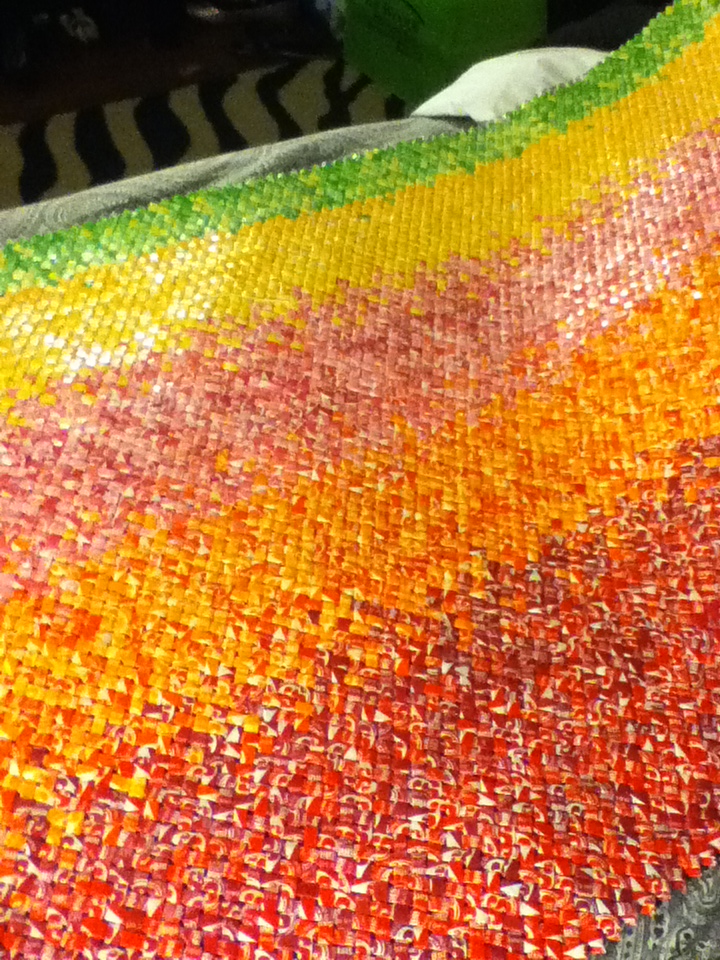
Sewing the chains together was the EASIEST part of the entire project. The hardest part was trying to add the zipper. The ends of the chains were too flimsy and my sewing machine couldn’t handle the thickness of the wrappers. Eventually I came to the conclusion that I would have to have a second element to both seal the ends and attach the zipper to.


On the right you can see underwear elastic pinned over top of the edges and painted to match the wrappers! This both sealed the edges and gave a sturdy, flexible material to attach the zipper to. Our local tailor, Giovanni’s Tailor Shop, was kind enough to help me add the zipper with his strong sewing machine. There was no way mine would go through the layers which ended up being about half an inch thick!
The Result
In the end I had a complete dress that took 4 YEARS longer than I thought it would but well worth the result. I didn’t count the exact number of wrappers over the years but I can safely estimate over 10,000. Thankfully there were no cavities as a result!
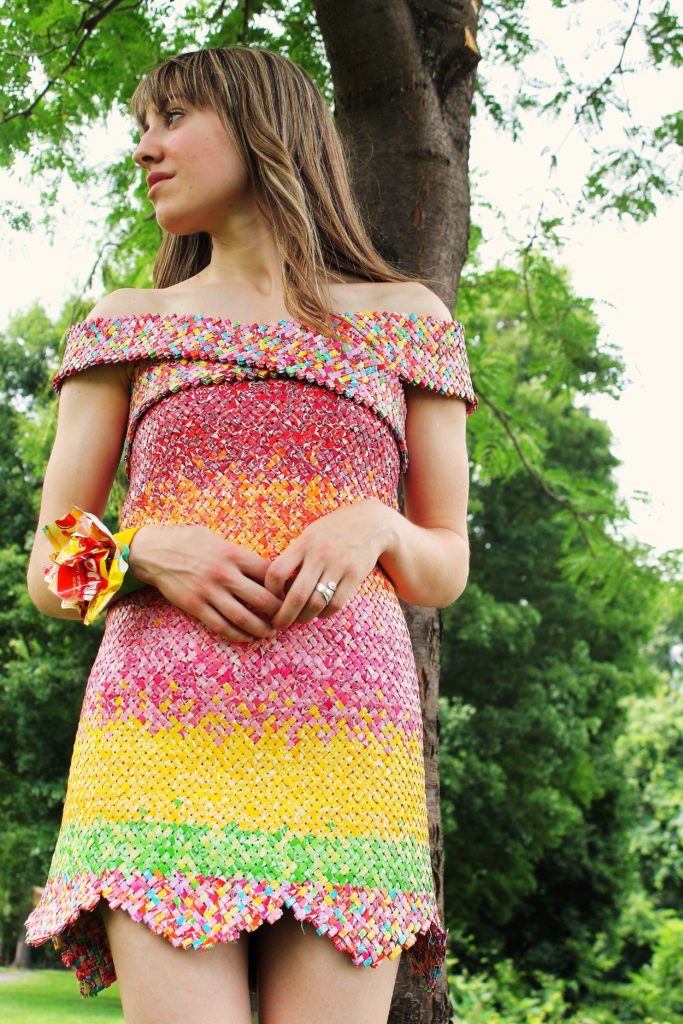

My husband proposed in 2013 a few months after it was finished and 2 years later it had a nice display at our wedding reception. NO, I didn’t wear it as my wedding dress! xD That’s another story…
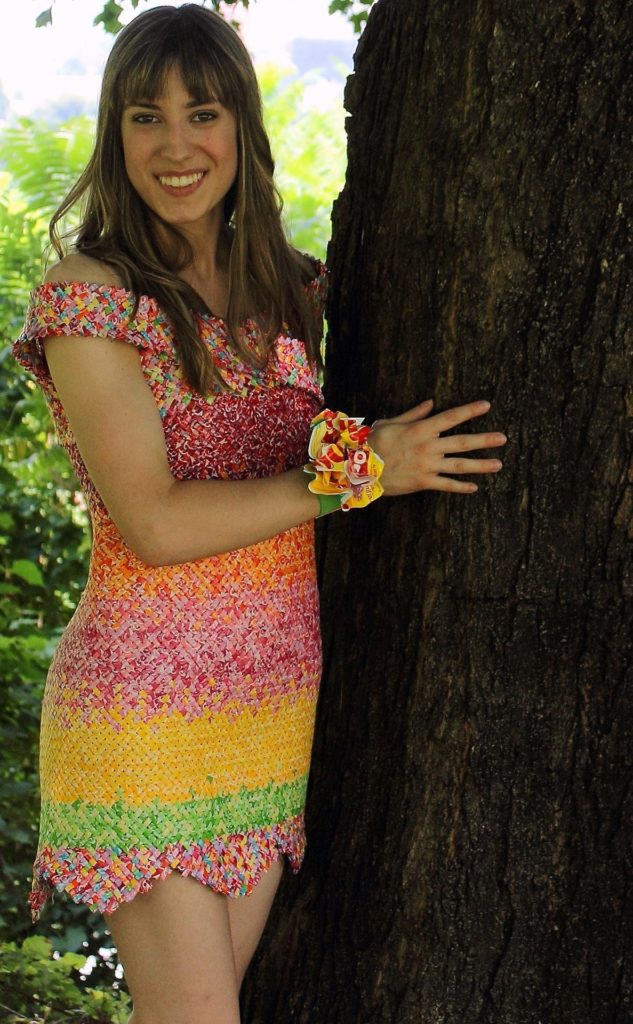
To see more of the finished dress visit my next post: Accessories for the Dress Made from 10K+ Starburst Wrappers.
