🎨Traceables available here:
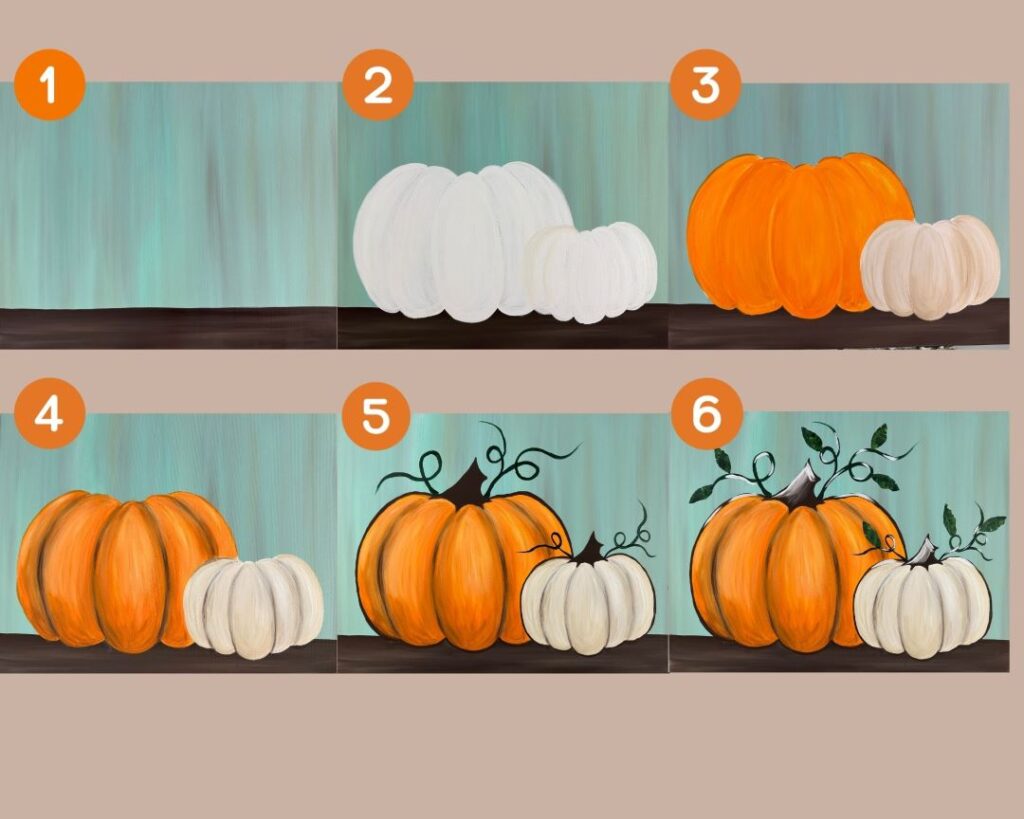
This is one of my favorite pumpkin painting tutorials for beginners! In this video I’ll show you step by step how to paint your own pair of pumpkins using simple shapes and acrylic painting techniques
Painting Steps:
- 1. Background: 00:00
- 2. Pumpkin Shapes: 1:16
- 3. Pumpkin Colors: 3:52
- 4. Pumpkin Ribs and shading: 5:33
- 5. Pumpkin Outlines: 8:16
- 6. Pumpkin Stems: 8:38
- 7. Pumpkin Vine and Leaves: 9:37
- 8: Pumpkin Highlights: 10:51
🎨Acrylic Paint Colors:
- Seafoam Green
- Tan
- Dark Brown
- White
- Orange
- Yellow
- Dark Green
- Light Green
🖌Brushes:
- Mop Brush
- Size 8 Round
- Size 3 Round
- Size 1 Round
- Size 4 Fan
Note- for the smaller detail I like to switch between the size 1 and 3 round brush…you decide which size works the best for you!
FAQ:
- Q: What kind of paint do you use?
- A: This was acrylic craft paint
- Q: What’s a “mop brush”?
- A: *A large round brush used for backgrounds or to blend large areas on a canvas. I use a wet n wild makeup brush at the dollar store (great for blending!) *You could also use a large flat brush instead.
- Q: What are you painting on?
- A: This was 16×20 stretch canvas
This easy pumpkin painting idea is perfect for beginners learning how to paint with acrylic craft paint on canvas. It also makes a great painting for paint parties at home! Don’t forget a hair dryer helps to dry the paint in between layers. Painting the pumpkin white first as a base layer is important because it will make the color you choose really stand stand out! You will learn how to paint simple highlights and shading on the pumpkin to make them look more realistic in this tutorial as well. My favorite fan brush leaf technique is great for painting easy pumpkin leaves, but you could always add more realistic pumpkin leaves if you wish.

