Traceables available here:
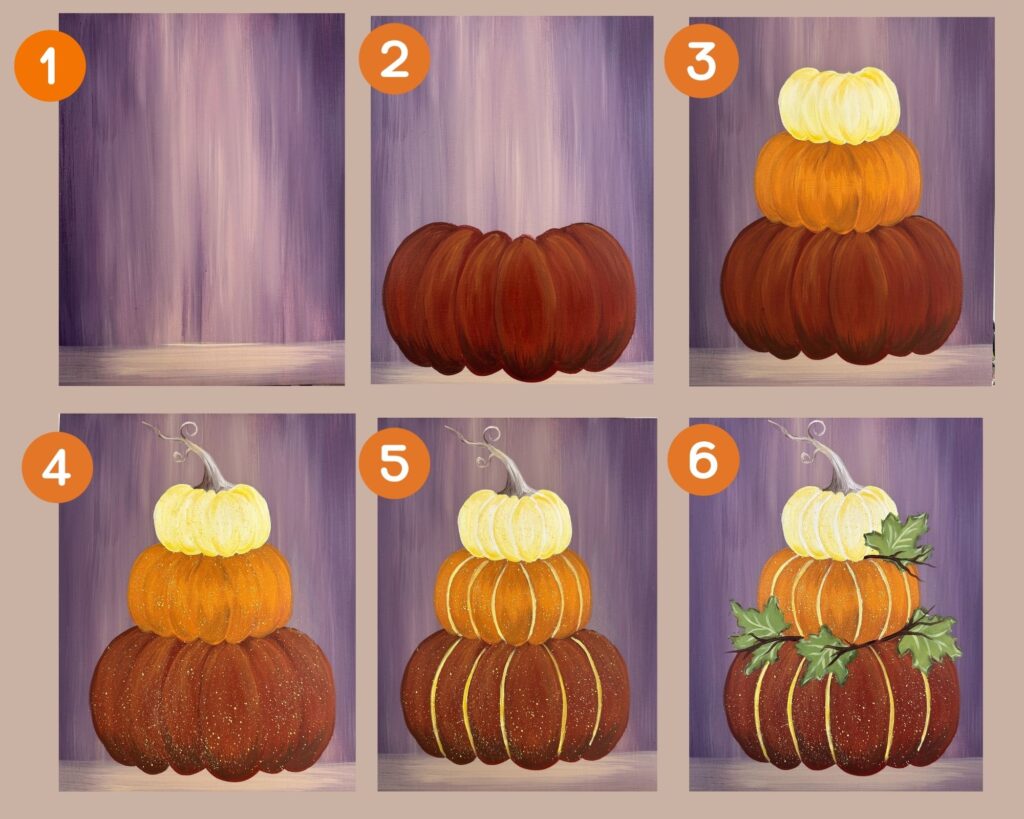
This beginner stacked pumpkin painting has all the fun fall colors! 🎨😍 It’s not everyday I find inspiration on a trip to Walmart, but the pumpkin decor this year was just too cute. Here is a quick tutorial how to paint a picture of your own stacked pumpkins!
Painting Steps:
- Background: 00:00
- Bottom pumpkin: 00:55
- Middle pumpkin: 3:31
- Top pumpkin: 4:59
- Splatter texture: 6:08
- Pumpkin stem: 6:42
- Decorative lines: 7:16
- Leaves: 7:45
- Branches and berries: 9:21
🎨Colors:
- Purple
- Tan
- Dark Red
- Dark Brown
- Orange
- Yellow
- Dark Yellow
- White Green
🖌Brushes
- Mop Brush
- Size 6 round
- Size 3 round
- Size 1 round
- Size 0 detail
- Flat brush (or toothbrush) for splatter Leaf for stamp (optional)
FAQ:
- Q: What kind of paint do you use?
- A: This was acrylic craft paint
- Q: What’s a “mop brush”?
- A: A large round brush used for backgrounds or to blend large areas on a canvas. I use a wet n wild makeup brush at the dollar store (great for blending!) *You could also use a large flat brush instead.
- Q: What are you painting on?
- A: This was 11×14 canvas board
In this beginner acrylic painting tutorial I show you step by step how to paint a beginner stack of pumpkins using simple painting techniques. Shading and highlighting the pumpkins with certain colors will make them look more realistic. The splatter technique and colors were inspired by the fall decor stacked pumpkins at Walmart of all places! This easy painting uses splatter paint too. If you do use the splatter technique make sure to cover the background of your painting with some paper or paper towels first.

Happy Painting!
